Hello Lovely! and welcome to my Free Cloud Baby Mobile Crochet Amigurumi Pattern.
This adorable Cloud Baby Mobile Amigurumi Pattern is a must-make for crochet lovers with a baby or grandbaby on the way.
Or even just as a baby shower gift for a friend.
I designed it to be simple, fun and beginner-friendly, this pattern works up quickly and makes the perfect baby shower gift.
It can also be made in different colours which I think pastel colours work great for it.
It helps add adorableness to any nursery and is just a beautiful crochet item.
I’ve made this pattern super simple to follow so you can enjoy the process and end up with your own Cloud Baby Mobile.
I do hope you love my free pattern and I would love to see this mobile in other colours so be sure to post yours up in the comments.
So without further ado, my Free Cloud Baby Mobile Crochet Amigurumi Pattern.
This pattern is also available as an ad-free, printer-friendly pdf pattern that can be purchased at the link below on Etsy.
Ad-Free, Printer-Friendly PDF Pattern of Cloud Baby Mobile Crochet Amigurumi Pattern
Continue down for the free version.

Free Cloud Baby Mobile Crochet Amigurumi Pattern.
Copyright © 2025 by Nicola Rattley.
All rights reserved. No part of this pattern may be reproduced in any form or by any electronic or mechanical means, including information storage and retrieval systems, without written permission from the publisher.
The contents of this pattern are for personal use only. Patterns herein may be reproduced in limited quantities for such use.
Required:
Hook Size – 4mm (AUS).
Wool Ply – 8 Ply, DK.
1 Ball of Main Colour (White).
1 Ball of Second Colour (Green).
1 Ball of Third Colour (Purple).
Tapestry Needle.
Polyester Toy Filling.
15mm Safety Eyes.
WARNING – If this item will be in reach of a small toddler under the age of 6, I recommend that you embroider the eyes instead so they don’t pose a choking hazard, especially if the child will be left unattended with the item.
Stitch Marker.
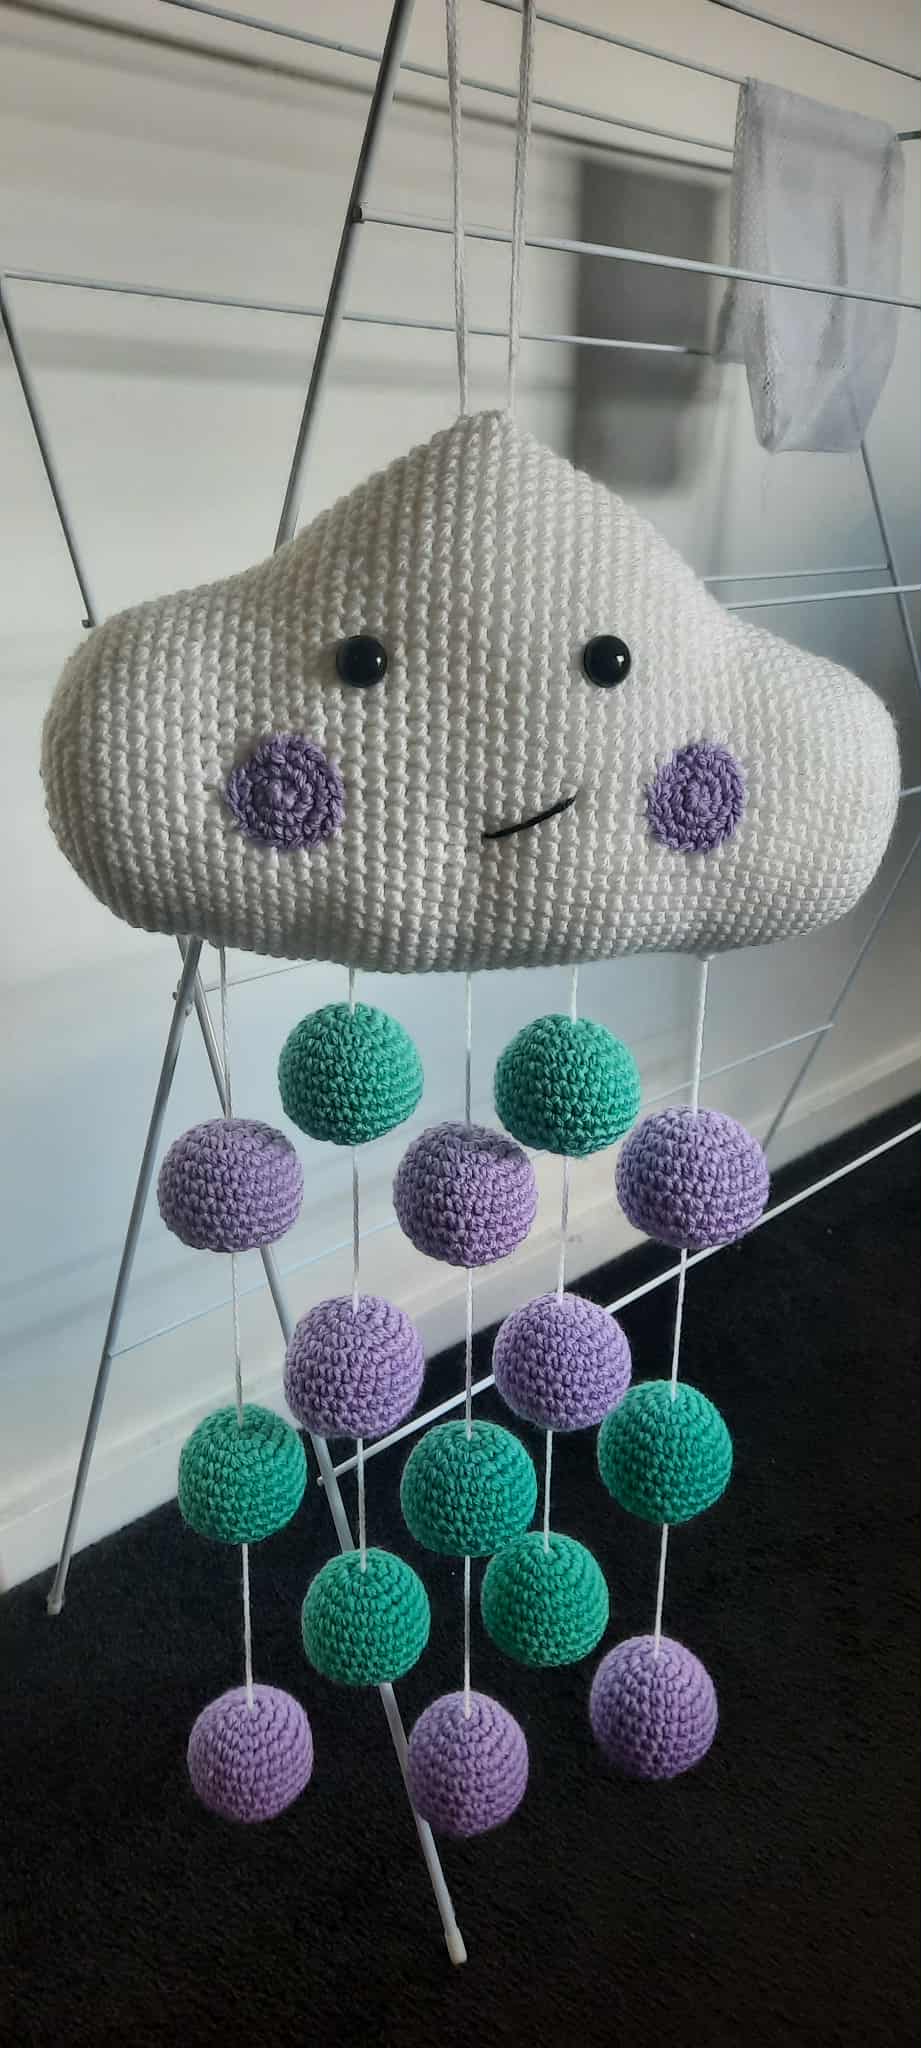
Finished Size is 24 Inches Long (including with the pom poms) and 12 Inches Wide.
Abbreviations: (This Pattern is for US Terminology).
MC – Magic Circle (otherwise known as Magic Ring).
SC – Single Crochet.
Inc – Increase (2 SC in same stitch).
Dec – Decrease (SC 2 stitches together).
St – Stitch.
Sts – Stitches.
Pattern.
Cloud.
(Stuff as you go – tip insert the eyes is easier before you stuff).
This Pattern is worked in rounds, do not slip or chain stitches.
Using your main colour choice. (White).
Round 1 – SC 6 into Magic Circle. (6 sts remaining).
Round 2 – (Inc) 6 times. (12 sts remaining).
Round 3 – (SC 1, Inc) 6 times. (18 sts remaining).
Round 4 – (SC 2, Inc) 6 times. (24 sts remaining).
Round 5 – (SC 3, Inc) 6 times. (30 sts remaining).
Round 6 – (SC 4, Inc) 6 times. (36 sts remaining).
Round 7 – (SC 5, Inc) 6 times. (42 sts remaining).
Round 8 – (SC 6, Inc) 6 times. (48 sts remaining).
Rounds 9 – 18 – SC 10 Rounds.
This next round is where you begin shaping the top of the cloud.
Round 19 – SC 21, (Inc) 6 times, SC 21. (54 sts remaining).
Round 20 – SC Round.
Round 21 – SC 21, (SC 1, Inc) 6 times, SC 21. (60 sts remaining).
Rounds 22 – 23 – SC 2 Rounds.
Round 24 – SC 21, (SC 2, Inc) 6 times, SC 21. (66 sts remaining).
Rounds 25 – 38 – SC 14 Rounds.
(Insert your first safety eye between rounds 26-27).
(Insert your second safety eye between rounds 38-39).
Round 39 – SC 21, (SC 2, Dec) 6 times, SC 21. (60 sts remaining).
Rounds 40 – 41 – SC 2 Rounds.
Round 42 – SC 21, (SC 1, Dec) 6 times, SC 21. (54 sts remaining).
Round 43 – SC Round.
Round 44 – SC 21, (Dec) 6 times, SC 21. (48 sts remaining).
Rounds 45 – 54 – SC 10 Rounds.
Round 55 – (SC 6, Dec) 6 times. (42 sts remaining).
Round 56 – (SC 5, Dec) 6 times. (36 sts remaining).
Round 57 – (SC 4, Dec) 6 times. (30 sts remaining).
Round 58 – (SC 3, Dec) 6 times. (24 sts remaining).
Round 59 – (SC 2, Dec) 6 times. (18 sts remaining).
Round 60 – (SC 1, Dec) 6 times. (12 sts remaining).
Round 61 – (Dec) 6 times. (6 sts remaining).
Fasten Off.
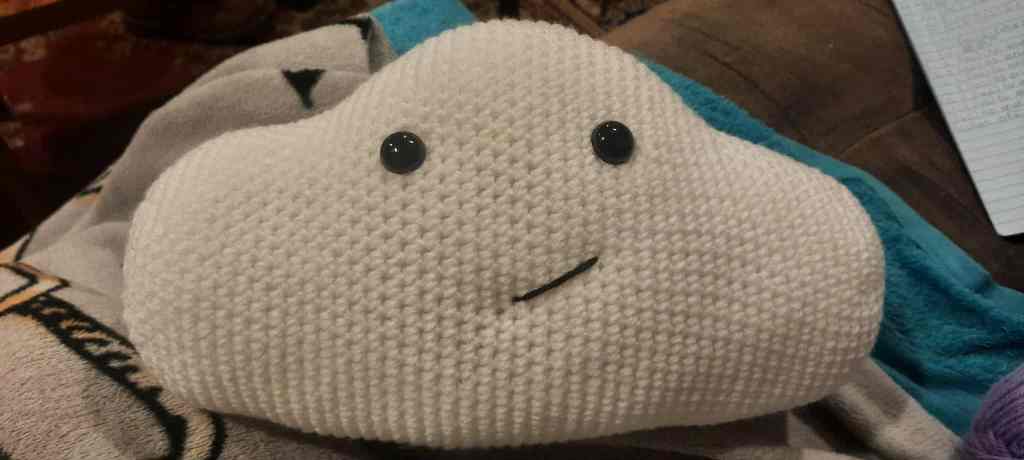
You should now have your cloud.
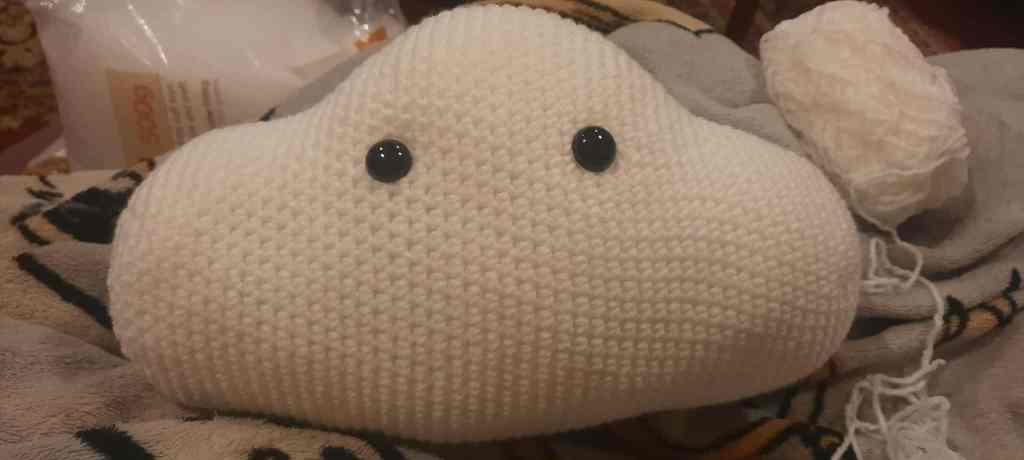
Once this is done you can embroider your mouth, I did a half mouth, but you can do any style you choose.
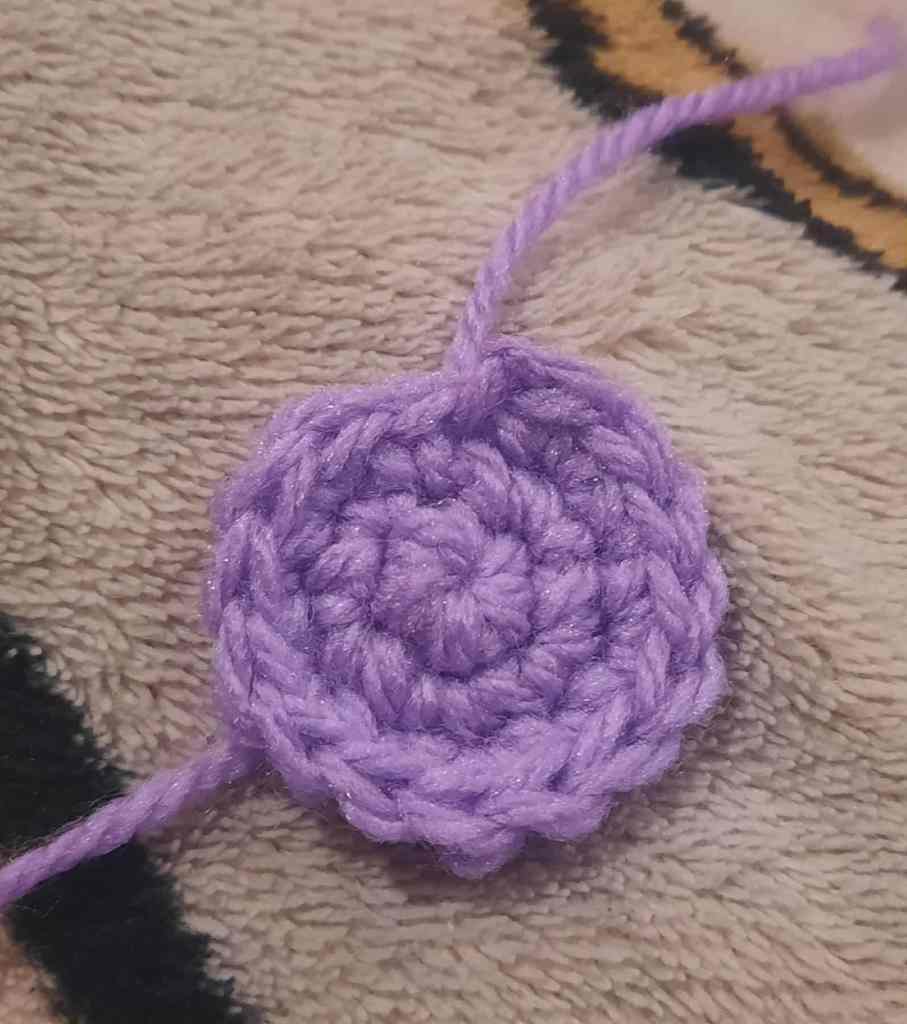
Cheeks. (Make Two).
Using your second colour choice. (Purple).
Round 1 – SC 5 into Magic Circle. (5 sts remaining).
Round 2 – (Inc) 5 times. (10 sts remaining).
Round 3 – (SC 1, Inc) 5 times. (15 sts remaining).
Fasten Off.
You should now have your two cheeks.
Now you can sew them onto the clouds face.
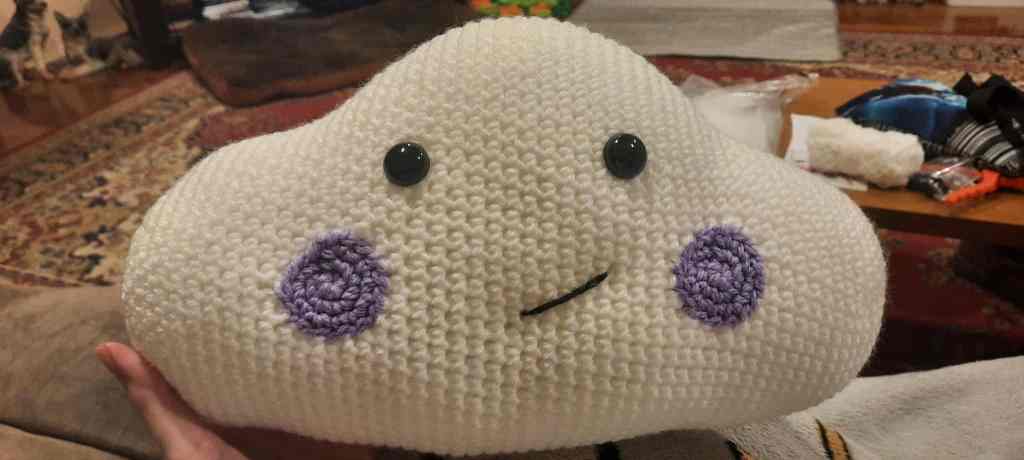
I like to place mine where the increases and decreases start.
Pom Pom / Balls.
Make 8 of the colour you used for your cheeks (purple) and make 7 for your third colour choice (greenish teal).
Round 1 – SC 6 into Magic Circle. (6 sts remaining).
Round 2 – (Inc) 6 times. (12 sts remaining).
Round 3 – (SC 1, Inc) 6 times. (18 sts remaining).
Round 4 – (SC 2, Inc) 6 times. (24 sts remaining).
Rounds 5 – 9 – SC 5 Rounds.
Round 10 – (SC 2, Dec) 6 times. (18 sts remaining).
Round 11 – (SC 1, Dec) 6 times. (12 sts remaining).
I would recommend you stuff the pom pom / ball here.
Round 12 – (Dec) 6 times. (6 sts remaining).
Fasten Off.
Once you have your 8 balls of your second colour choice, and your 7 balls of your third colour choice you can start making the strands.
For full step-by-step photos of assembling the pom pom ball strands (including exact spacing and alignment), you can grab the printable PDF here – Ad-Free, Printer-Friendly PDF Pattern with 10+ Step-by-Step pictures and instructions
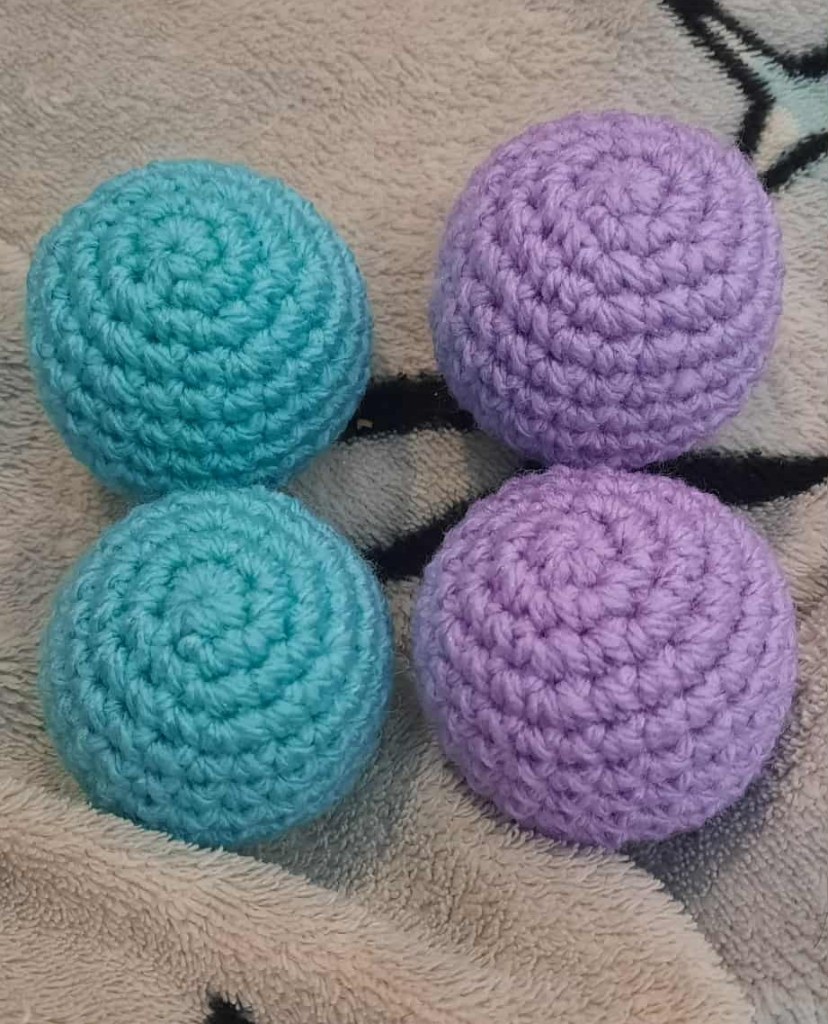
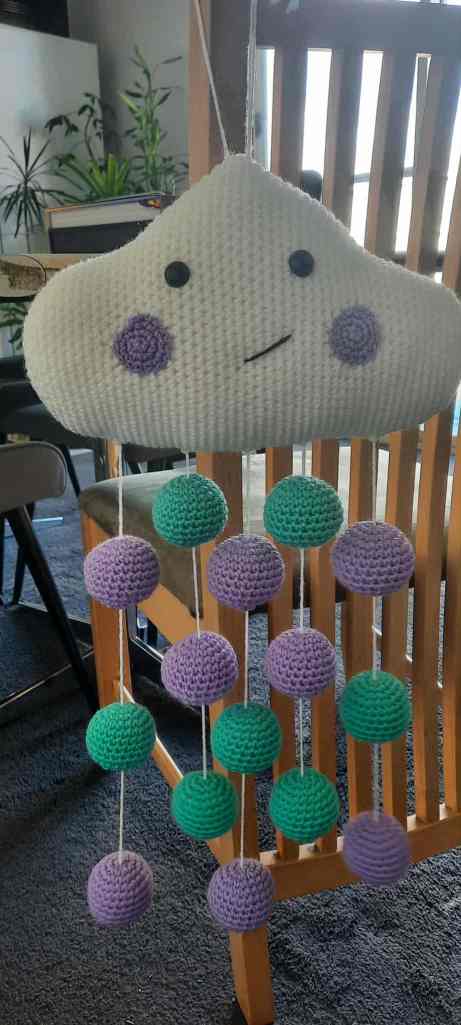
These were my colour choices, however you can make them in whatever colours you choose.
Step One – Get some white Yarn, cut a long thread, insert yarn into tapestry needle (make sure you leave a long thread on both ends as you will be going back and using the other side to sew into the cloud).
Step Two – Insert your hook into the top of your first ball (I started with purple).
Your needle should come out of what will be the bottom of the ball.
Step Three – Sew into the bottom of the ball so it won’t slide around everywhere.
This should have your first ball secure.
Step Four – Do the same with your next ball (blue).
Space the balls evenly along the strand, adjusting based on your preferred look.
For the exact measurements and perfect even strand spacing + Step-by-Step pictures and instructions, see the printable PDF – Ad-Free, Printer-Friendly PDF Pattern with 10+ Step-by-Step pictures and instructions
Once you have your third ball onto your strand, secure it into place, sew in the loose end and cut the rest off.
This is your first strand.
Now you sew it into your cloud.
Next you will want to make your second strand, starting this time with the other colour.
Once you have finished all your strands and attached them, you should have 3 strands each.
And your Cloud Baby Mobile should be done!
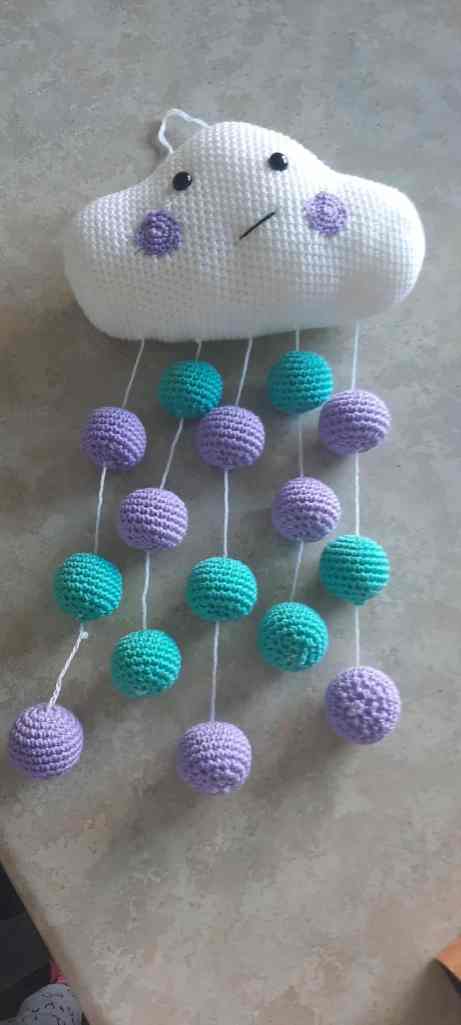
You have completed your Cloud Baby Mobile!
If you have enjoyed crocheting my adorable Free Cloud Baby Mobile Crochet Amigurumi Pattern I would love if you could leave a comment telling me what you love about it, also don’t forget to post up your pictures of your own cute Mobile!
Also don’t forget to subscribe to my website for more Free Patterns to come.
If you need more help with this pattern, including exact placement and sewing technique for the pom pom balls + 10 Step-by-Step pictures and instructions you can find my Ad-Free, Printer-Friendly PDF Pattern Here!
If you have enjoyed this pattern you also might enjoy my:
Free Teddy Bear Curtain Tie Backs Crochet Pattern
Free Crochet Pig Amigurumi Pattern
Free Puppy Baby Blanket Crochet/Amigurumi Pattern
Free Sweet Pea the Elephant Crochet Pattern
Xx Nicola.

Leave a Reply