Hello Lovely! And welcome to my Free Poke-Ball Crochet Pattern.
If you are like me you either love Pokemon, or know somebody who does, I am both.
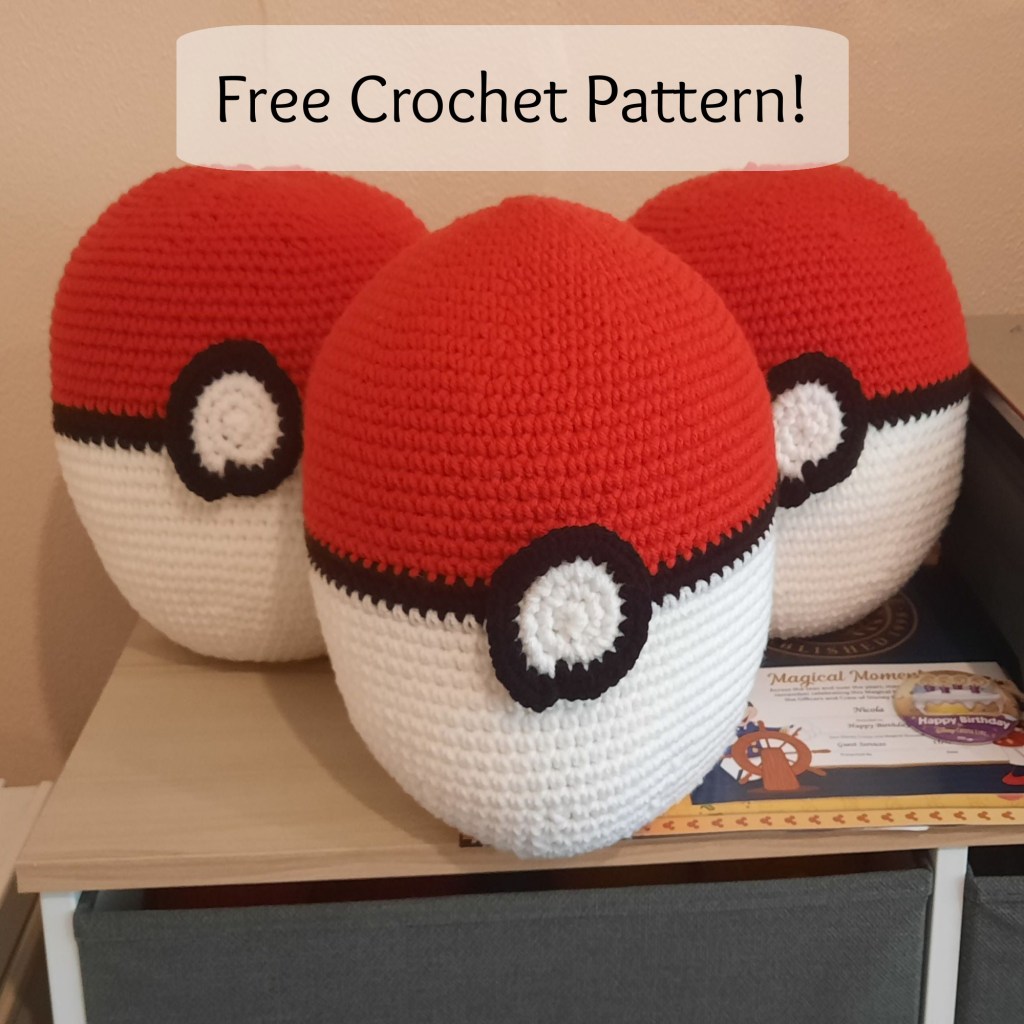
I love Pokemon and for Christmas I decided (1 Week Before Christmas) that I was going to design my own Poke-ball Door Stop Crochet Pattern and make 3 of them up for people.
1 went to my oldest brother, the other to my brother in law, and the other to one of my friends.
I made all 3 in just under 1 week, I was very busy that week!
But they all loved them and that is what made it worth it.
Now you don’t have to crochet this up as a door stop if you don’t want, you can just make a plush poke-ball that can be a toy, it is up to you.
I do hope you love my free pattern, but to be warned, Pokemon is very copyrighted, you cannot make my pattern and then sell the finished item, because the images of anything to do with Pokemon are copyrighted.
And yes I know there are lots of people out there who still make the items and sell them, but if they get caught they have no one to blame but themselves, don’t let that happen to you, be smart and be safe.
Just make them for great gifts for people.
So without further ado, I hope you enjoy my Free Poke-Ball Crochet Pattern.
Required:
Hook Size- 4mm Hook (AUS).
Wool Ply- 10 Ply Yarn.
1 Ball of White Wool.
1 Ball of Black Wool.
1 Ball of Red Wool.
Stitch Marker to mark your beginning stitch.
Tapestry Needle.
Polyester Toy Filling.
1kg of Rice (I used this to weight down the door stops, I put 1kg of rice into two bags, I double bagged it to be safe, then put them in the bottom of the Poke-ball before stuffing it).
Abbreviations (This pattern is for US Terminology).
SC – Stands for Single Crochet.
Inc – Stands for Increase Stitch.
Dec – Stands for Decrease Stitch.
St – Stands for Stitch.
Sts – Stands for Stitches.
Warning- This pattern is quite big, so if you want to make smaller poke balls I would recommend using a smaller hook size.
Pattern.
Pokeball.
Magic Circle 10 Stitches using White Yarn.
Round 1 – SC Round.
Round 2 – Inc in each st. (20 Stitches Remaining).
Round 3 – SC Round.
Round 4 – (SC 1 st, Inc) repeat to end of round. (30 Stitches Remaining).
Round 5 – SC Round.
Round 6 – (SC 2 sts, Inc) repeat to end of round. (40 Stitches Remaining).
Round 7 – SC Round.
Round 8 – (SC 3 sts, Inc) repeat to end of round. (50 Stitches Remaining).
Round 9 – SC Round.
Round 10 – (SC 4 sts, Inc) repeat to end of round. (60 Stitches Remaining).
Round 11 – SC Round.
Round 12 – (SC 5 sts, Inc) repeat to end of round. (70 Stitches Remaining).
Round 13 – SC Round.
Round 14 – (SC 6 sts, Inc) repeat to end of round. (80 Stitches Remaining).
Rounds 15 – 24 – SC 10 Rounds.
Change Yarn Colour to Black.
Rounds 25 – 26 – SC 2 Rounds.
Change Yarn Colour to Red.
Rounds 27 – 36 – SC 10 Rounds.
Round 37 – (SC 6 sts, Dec) repeat to end of round. (70 Stitches Remaining).
Round 38 – SC Round.
Round 39 – (SC 5 sts, Dec) repeat to end of round. (60 Stitches Remaining).
Round 40 – SC Round.
If you are making the weighted door stops, this is when I recommend you put the 1kg double bagged rice into the bottom of the pokeball and start filling in the stuffing around it.
If not then this is where you just start stuffing the pokeball normally.
Round 41 – (SC 4 sts, Dec) repeat to end of round. (50 Stitches Remaining).
Round 42 – SC Round.
Round 43 – (SC 3 sts, Dec) repeat to end of round. (40 Stitches Remaining).
Round 44 – SC Round.
Round 45 – (SC 2 sts, Dec) repeat to end of round. (30 Stitches Remaining).
Round 46 – SC Round.
Round 47 – (SC 1 st, Dec) repeat to end of round. (20 Stitches Remaining).
Round 48 – SC Round.
Round 49 – Dec to end of round. (10 Stitches Remaining).
Fasten Off.
To tighten the pokeball once you have it completely stuffed to your satisfaction, I use my tapestry needle to sew into every stitch of the remaining 10, then pull it tightly closed.
Pokeball Button.
Magic Circle 6 Stitches using White Yarn.
Round 1 – Inc in every stitch to end of round. (12 Stitches Remaining).
Round 2 – Inc in every stitch to end of round. (24 Stitches Remaining).
Change Yarn Colour to Black.
Round 3 – Inc in every stitch to end of round. (48 Stitches Remaining.)
Fasten Off and Sew in all Loose Ends except the starting end.
To sew the Pokeball Button onto the ball, I used the loose end of the starting wool to sew it on only in the middle, leaving the rest of the button so it can bend.
If you want to sew on the entire button, sew in all loose ends then sew the button on in black wool around the final round.
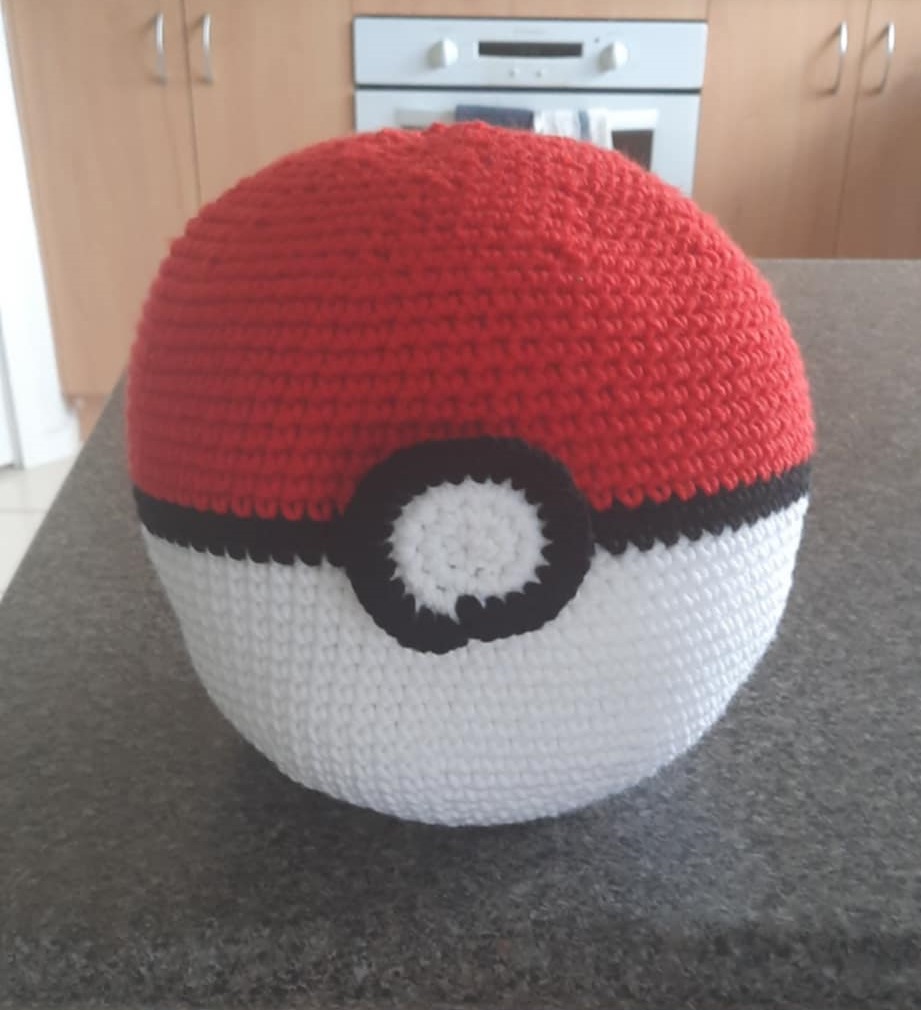
And there you should have it, your own Pokeball Door Stop!
I would love to know what you all think!
I hope you have had as much fun creating your own Poke-Ball Door Stop as I did designing this pattern for you!
Want to be notified when a new pattern is being released? Join my mailing list to be notified first when a new pattern is on it’s way.

Leave a Reply